Main Dish
Dry Brined-High Heat Roast Turkey
Learn how to make Dry Brined-High Heat Roast Turkey for Thanksgiving and enjoy delicious leftovers for your late-night sandwiches.
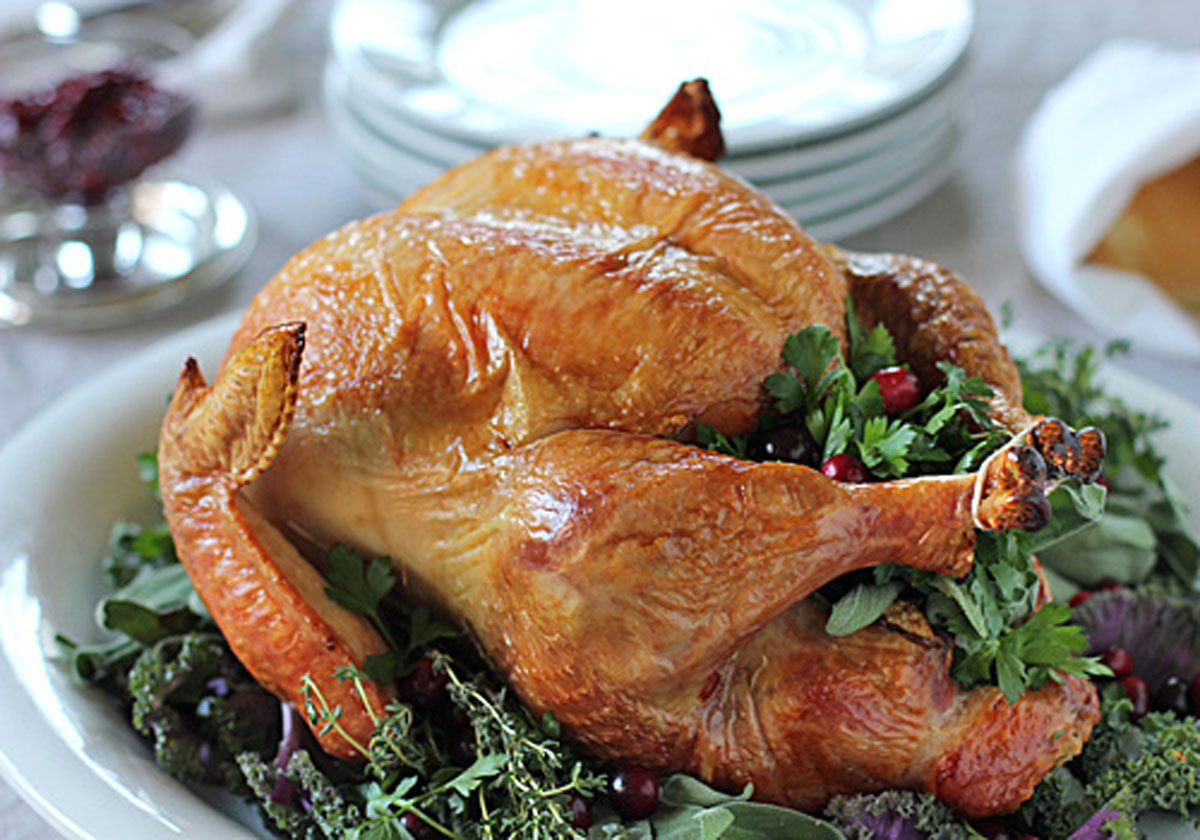
We are spending Thanksgiving this year at my parents’ house. Although my mother and father will be going back to basics (why mess with what is already good?) with the bird and all the trimmings, I make sure to make the whole nine yards just for leftovers when we get home for that late-night turkey sandwich plate. I have shared appetizers, side dishes, breads, and dessert (all can be found on my recipe link at the top of the page), so now I would like to share our menu with links to previous recipes and the recipe for the main event —the TURKEY!
Thanksgiving 2011
Curried Chicken Log
(Why my family insists on having chicken before turkey is beyond me.)
Caramelized Pear and Gruyère Torta
Smoked Salmon Stuffed Deviled Eggs
Roast Turkey
Whole Berry Cranberry Sauce
Cornbread Dressing with Fresh Herbs
Creamed Corn
Sweet Potatoes baked with a Pecan Streusel and Marshmallows
Steamed White Rice
Giblet Gravy
Southern-Style Green Beans
Braised Onions and Bacon
Buttery Pan Rolls
Buttermilk Tart
Browned Butter Pecan Tart
Pumpkin-Cream Cheese Truffles
Now that you’re all good and hungry, it is time to get down to business with Tom (Turkey, that is). This is hands down my favorite way to cook a turkey. I use two methods to get the juiciest, best-tasting turkey meat. It also helps that I buy, in my opinion, the best bird. I can’t recommend Bell & Evans poultry products enough. They are air-chilled, antibiotic-free, and organic with deep poultry flavor. Yes, you will pay more, but the result is worth it. If Bell & Evans products aren’t available, find the freshest turkey in your area instead. Steer clear of frozen ones injected with a solution and extra fats. They have too much white meat and too little flavor. Now that I have given you some fundamentals for purchasing turkey, let’s move on to the method.
As I stated, I use two methods. One is a dry brine, and the other is a high-heat roast. I’ll start with the dry brine. Dry brining (rubbing kosher salt between the meat and the skin) balances the bird’s moisture and pulls seasoning deep into the meat, not just onto the skin. I have used a wet brine before, but I feel the dry brine leaves the meat with a better texture (firm, not mushy) while still flavorful and very moist. The high-heat method is an easier, quicker way to roast a bird; it requires no turning or basting. I can roast a 12-to 13-pound turkey in 1 1/2 hours. For more information on this method, you can find some helpful reading in the cookbook “Roasting” by Barbara Kafka. Since you are roasting a turkey at 500ºF, make sure your oven is clean. A dirty oven means a lot of smoke, so turn on the vents.
To help you with the process, I have included a few step-by-step instructions below.
Warning: Graphic turkey images.
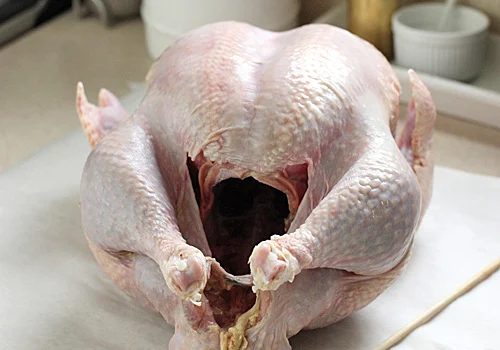
First, select a fresh turkey weighing 12 to 15 pounds. Remove and reserve the giblets and neck for gravy, if you’re making it. Trim any excess fat from the cavity.
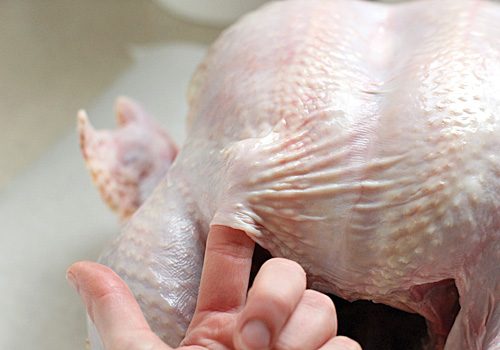
Carefully separate the skin from the meat. Separate the skin on each breast, leaving the skin on the middle of the breastbone intact. I like to use my fingers, but…
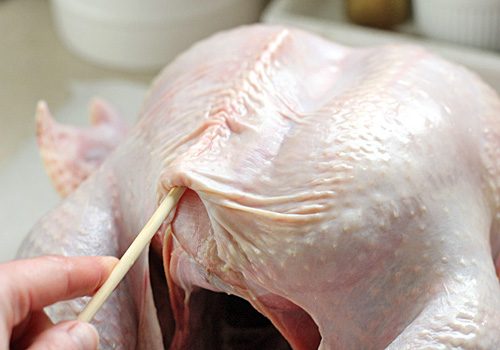
A chopstick can also help you get started. Just make sure to press against the meat and not into the skin. You do NOT want to break the skin. Doing so exposes the meat to the high cooking temperature, which results in dry meat.
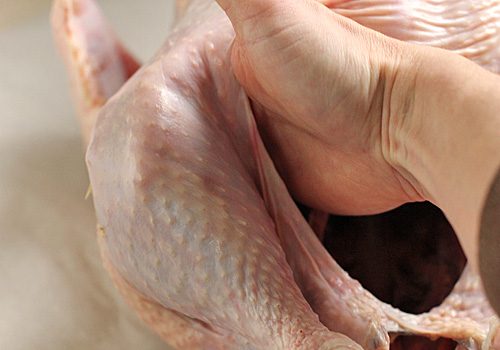
Continue with the legs and thighs, wrapping your fingers around the leg and thigh meat to loosen the skin. It may look difficult, but once you start, it becomes fairly easy. Once the skin is separated, sprinkle measured amounts (see recipe below) of kosher salt (see brand-specific below) into the cavity, then rub it into the breast, legs, and thighs. (Sorry, no picture. Hard to do that and hold a camera at the same time:)
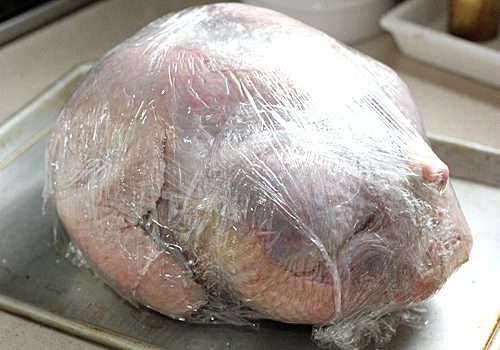
Wrap the turkey tightly in plastic wrap, place it on a baking sheet, and refrigerate it for 24-48 hours. Remove the turkey from the refrigerator, unwrap it, and thoroughly rinse off excess salt. Gently run water between the skin and meat several times to rinse the salt. You don’t want a salty bird or salty pan drippings. Drain and pat the turkey completely dry inside and out with paper towels. Dry skin will make for crisp skin. Wet skin will steam.
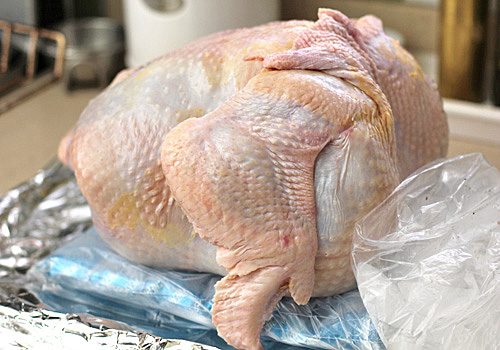
Line a baking sheet with aluminum foil and place an ice bag or freezer pack on top. Place the turkey breast, breast-side down, on the ice. Place another bag on the neck of the turkey, making sure the ice does not touch any of the dark meat. Since white meat cooks faster than dark meat, this method ensures the dark meat cooks thoroughly without the breast meat overcooking and drying out.
Meanwhile, adjust an oven rack to the lowest position and preheat the oven to 500ºF (yes, that high). Place a V-rack in a large, heavy-duty roasting pan. Place the turkey in the V-rack breast side up. Cover the tips of the wings and legs with small sheets of aluminum foil to prevent burning. Roast the turkey until the thickest part of the thigh reaches 165°F (the temperature will continue to rise while it rests). Check the turkey after 30 minutes. If the breast browns too quickly, lay a sheet of aluminum foil over the breast. Remove the foil 30 minutes before the turkey is done. A 12-pound bird will take about 1 hour and 20 minutes. A 15-pound bird will roast for up to 2 hours.
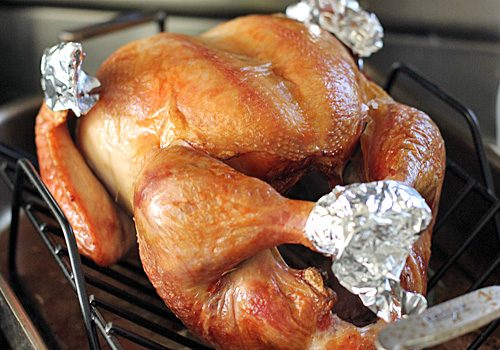
Carefully drain the juices from the bird’s cavity into the roasting pan. Reserve the juices for gravy and drizzling over unbaked dressing. (I yield almost 1 cup of juices and about 1/4 cup of fat from a 12 1/2-pound turkey). Transfer the turkey to a cutting board; lightly tent with aluminum foil and rest for at least 20-30 minutes before carving.
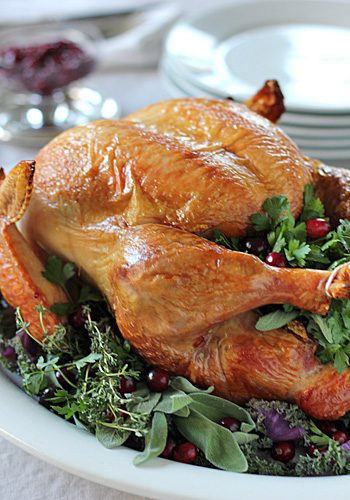
You can certainly go for presentation points and present your beautifully browned bird atop a bed of greens and herbs for a final resting place on your holiday table before…
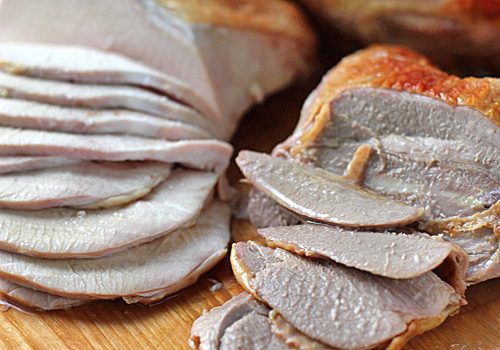
carving the meat, roasted to perfection! The dark meat is completely cooked through, and the white meat is still juicy and tender. After all that work, I am ready for a sandwich:)
I almost forgot —here is a great kitchen tip for reheating Thanksgiving leftovers (without using the microwave).
Dry Brined-High Heat Roast Turkey
By Nicole Prep: 30 minsCook: 1 hr 30 minsRefrigeration Time: 2 dTotal: 2 d 1 hr 55 mins Servings: 12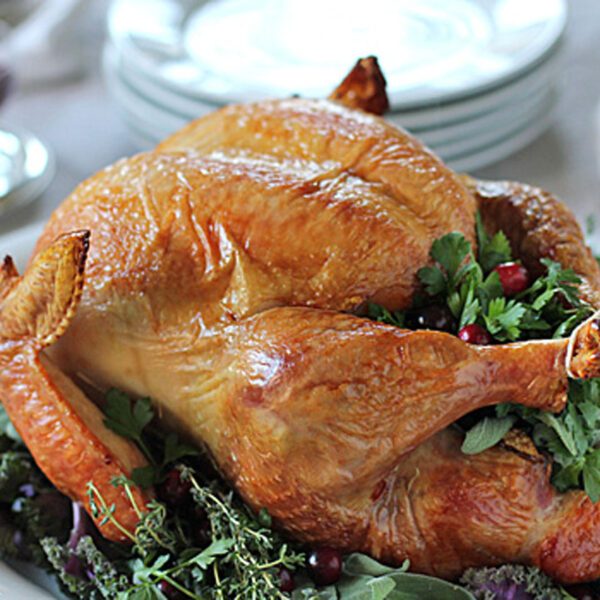 Amazingly tender and juicy roast turkey in under 2 hours!
Equipment
- Roasting pan with V-rack
- Instant read thermometer
Ingredients
- 1 fresh turkey, 12-14 pounds, giblets and neck reserved for gravy, if using
- Morton’s Kosher Salt or Diamond Crystal Kosher Salt
- 2 1-gallon bags filled with ice cubes or freezer packs placed in a separate bag
Instructions
- Trim the cavity of the turkey of excess fat. Carefully separate the turkey skin from the meat on the breast, legs, and thighs without breaking the skin. Sprinkle 4 1/2 teaspoons (Morton’s) or 2 tablespoons (Diamond Crystal) salt inside the cavity. Rub 2 1/4 teaspoons salt (Morton’s) or 1 tablespoon salt (Diamond Crystal) under the skin of each breast. Rub 1 teaspoon salt (Morton’s) or 1 1/2 teaspoon salt (Diamond Crystal) under the skin of each leg. Wrap the turkey tightly with plastic wrap and refrigerate for 24-48 hours.
- Remove the turkey from the refrigerator. Unwrap and thoroughly rinse off excess salt between the meat, skin, and cavity. Pat dry completely with paper towels. Place 1 bag of ice or freeze pack on a baking sheet lined with foil. Place the turkey breast side down on top of the ice. Place the other bag in the neck cavity, making sure the ice only touches the breasts and not the thigh. (Since the breast meat cooks faster than the white, icing the white meat ensures that the dark meat will be cooked through without the white meat being overdone). Allow the turkey to rest on the ice for 60-90 minutes.
- Meanwhile, adjust the rack to the lowest position and preheat the oven to 500ºF. Place a wire V-rack inside a large heavy duty roasting pan. Place the turkey (breast side up) on the V-rack. Loosely tie the legs together with a piece of kitchen twine and cover the tops of the wings and legs with a small piece of aluminum foil to prevent burning. Roast the turkey until the thickest part of the thigh reaches 165ºF on an instant read thermometer (the temperature will rise another 10 degrees while resting), about 1 hour 20 minutes for a 12-pound turkey and up to 2 hours for a 15-pound turkey. After 30 minutes, check to see if the breast is browning too quickly. If so, lay a large sheet of aluminum foil over the breast (do not wrap, just place). Remove the foil about 30 minutes before the bird is done. Carefully drain any juices from the bird into the roasting pan; reserve the pan juices for gravy if using, and place the turkey onto a cutting board. Cover the turkey lightly with aluminum foil and let rest for 20-30 minutes before carving. Enjoy!
Notes
The measurements of salt are different for each brand listed. Morton’s salt is denser that Diamond Crystal, so less is needed. Any other kosher salt is not recommended.Nutrition
Calories: 593kcal, Protein: 120g, Fat: 10g, Saturated Fat: 2g, Polyunsaturated Fat: 2g, Monounsaturated Fat: 3g, Trans Fat: 0.04g, Cholesterol: 355mg, Sodium: 624mg, Potassium: 1244mg, Sugar: 0.4g, Vitamin A: 159IU, Calcium: 58mg, Iron: 5mgNutrition information is automatically calculated, so should only be used as an approximation.